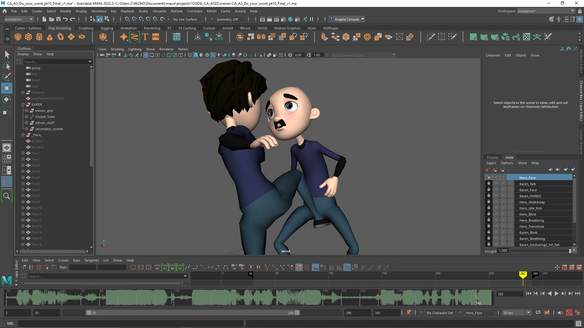
Character Animation
Jump to:
Some media might not load properly on the first time the page loads, I advise refreshing the page after the first load.
If it still shows "video unavailable" try also refreshing the page
Intro to 3D Animation
The bouncing ball
The first lecture of this module had me getting acquainted with Autodesk's Maya (version 2022.3) animation workspace.
Starting from a basic sphere shape and utilizing Maya's keyframing tool, the first objective was to make a ball bounce in place.
The second objective to make the ball move across the ground using Maya's Motion Trail feature, which creates an editable motion path.
Lastly making a render of the sequence using the Playblast feature.
While making this exercise we explored squishing the ball along the movement and investigated motion, timing and weight of different types of balls. Youtube offers a wide variety of reference videos to help compare how different ball shaped objects act when being dropped/thrown.
The Playblast of the exercise was exported in .avi format and then converted to .gif using CloudConvert https://cloudconvert.com/avi-to-gif
Video References:
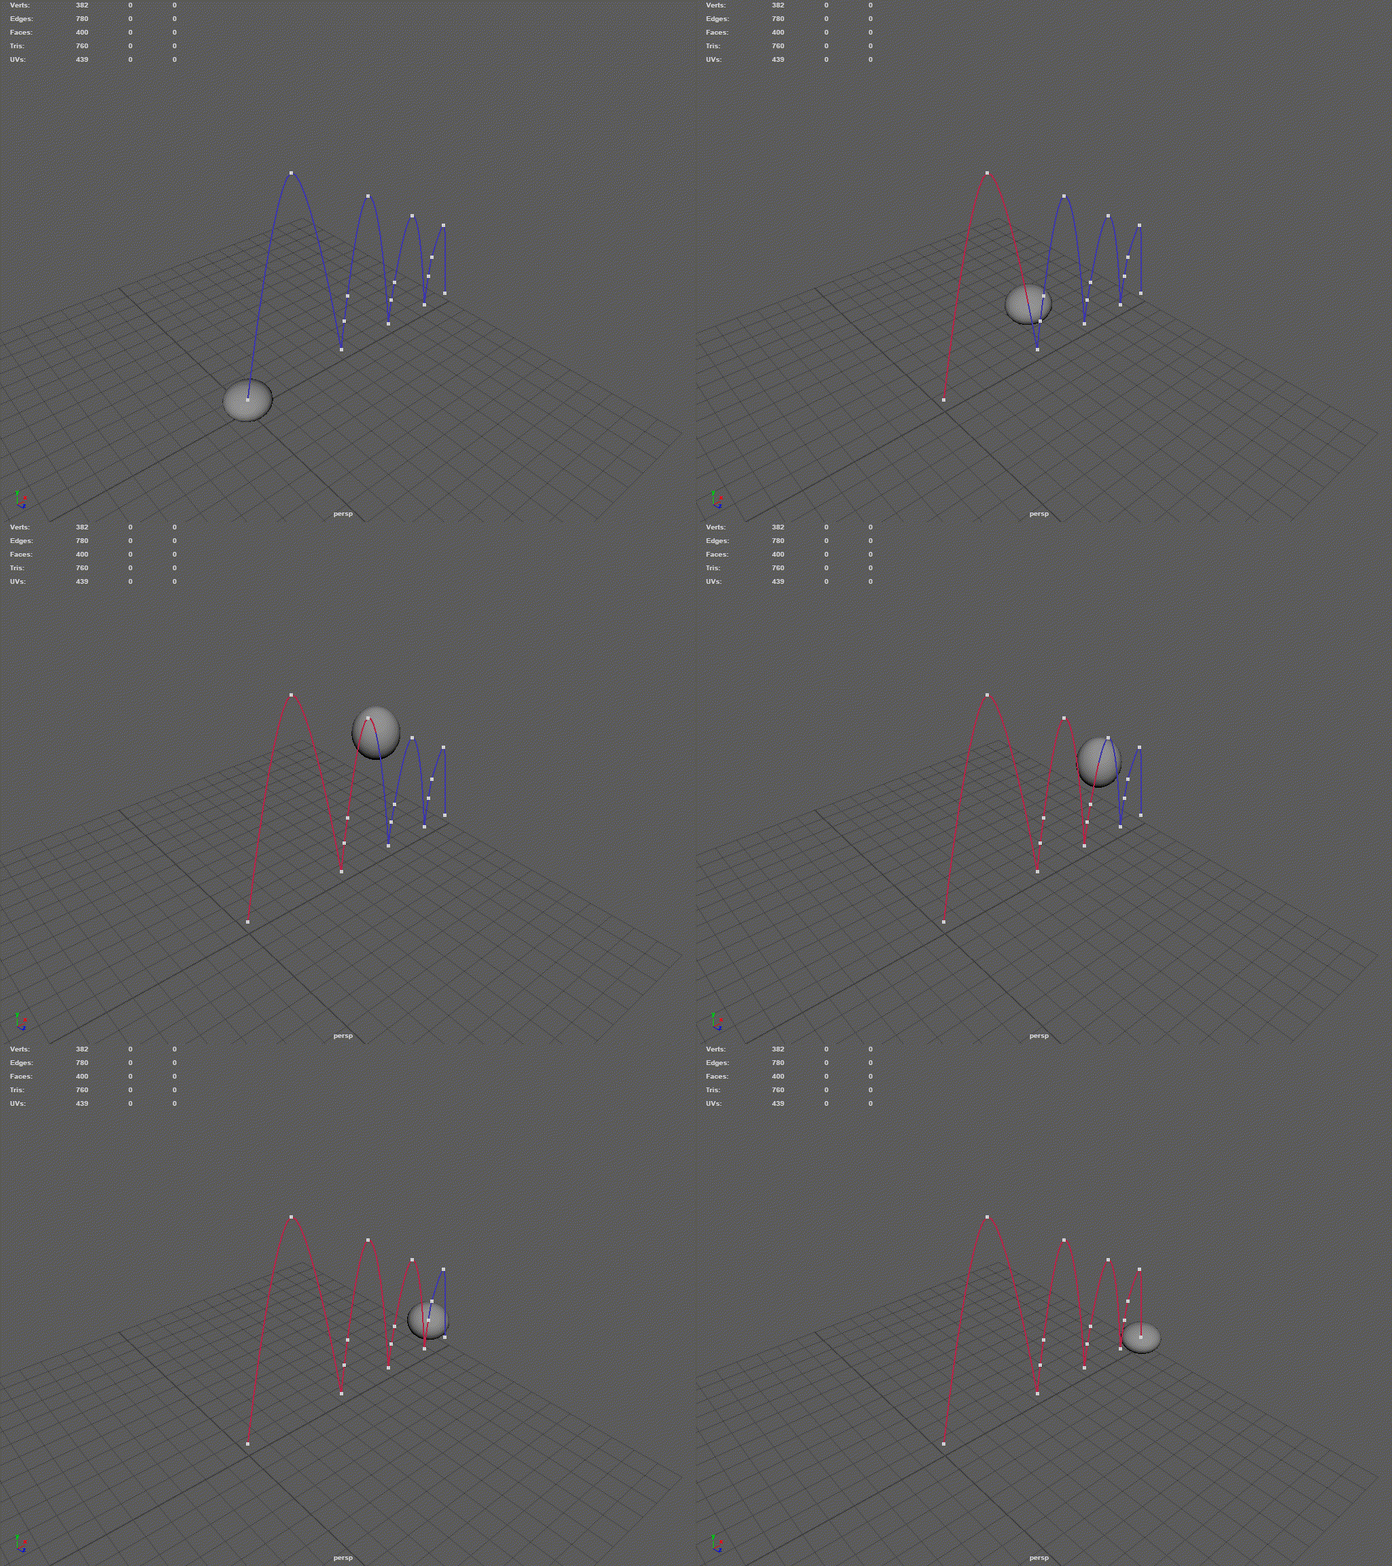
Gif animation of the bouncing ball made during Week 1 workshop with motion trail
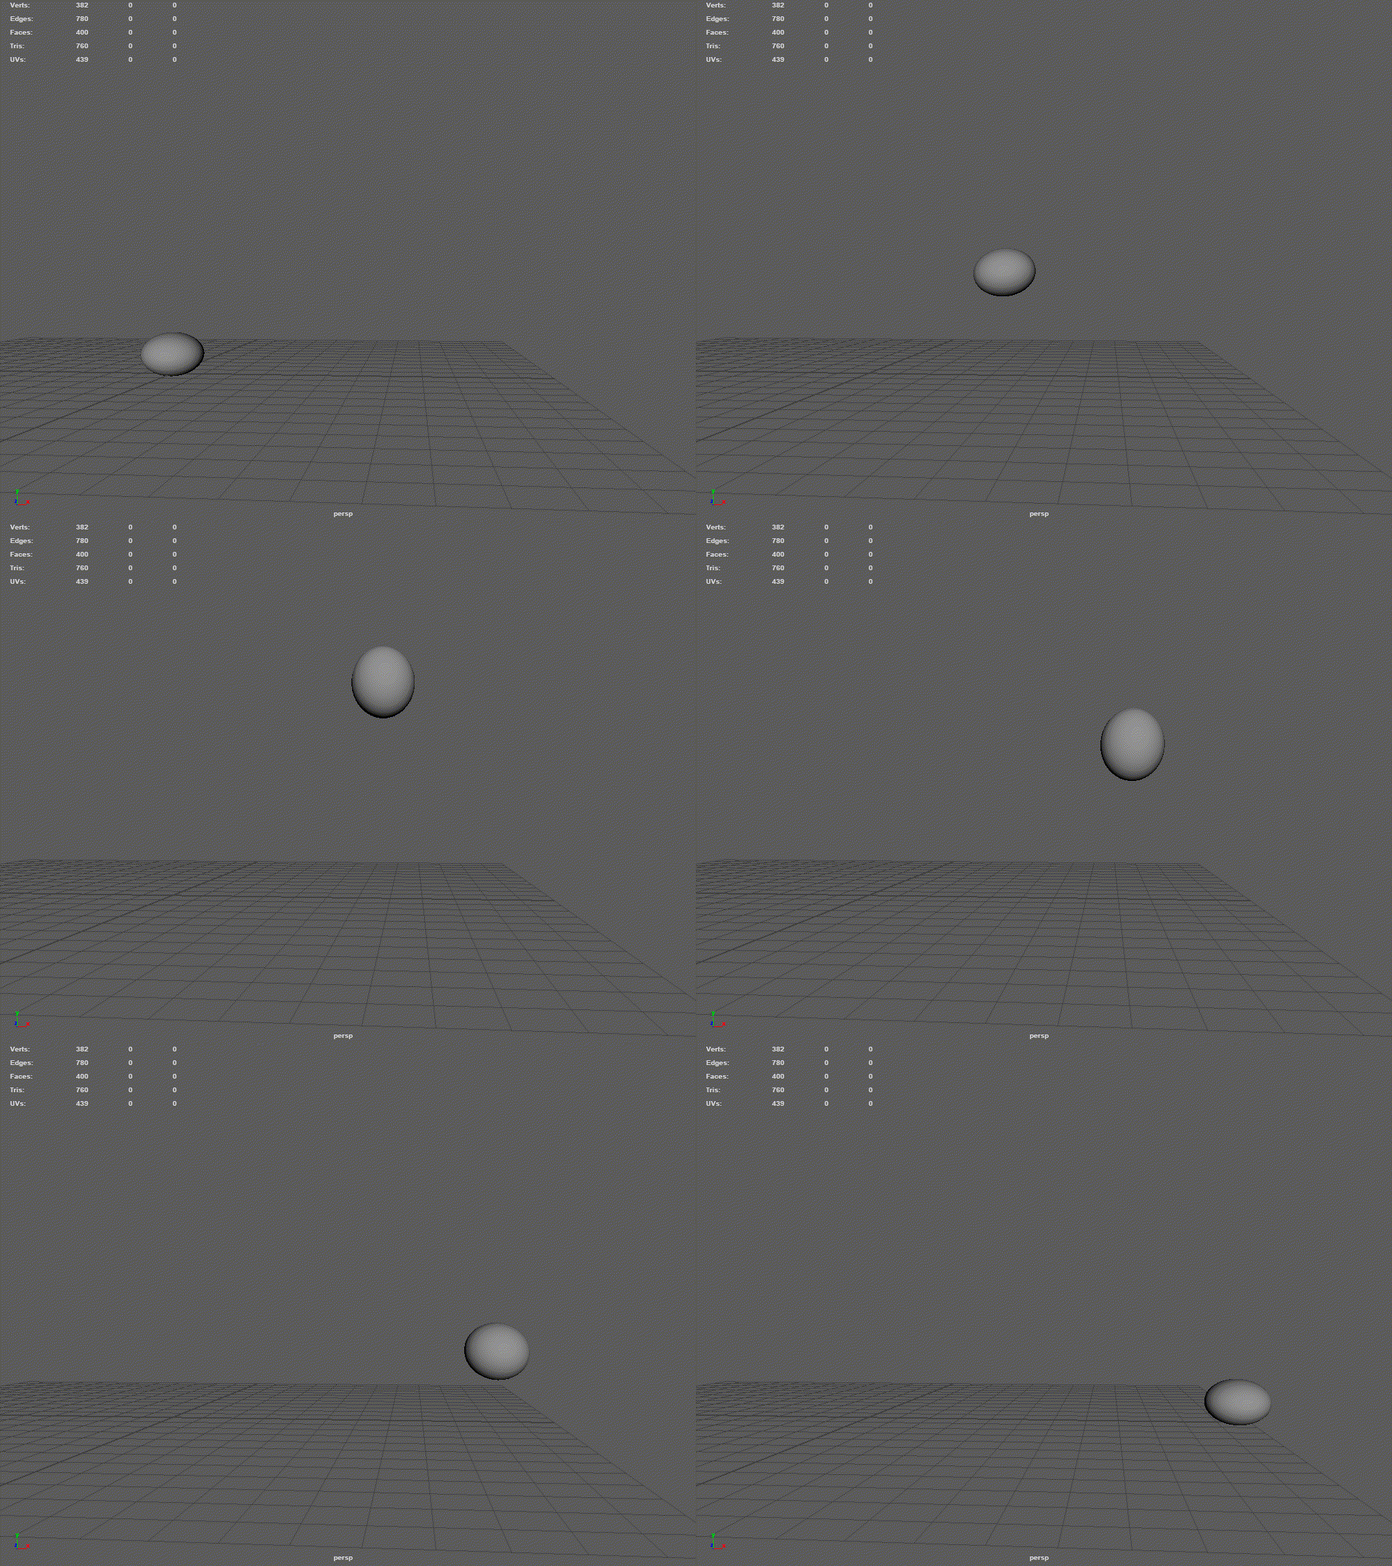
Gif animation of the bouncing ball made during Week 1 workshop without motion trail
The Obstacle course
Expanding on last week's basics, project with a pre rigged ball was provided to experiment with.
I personally found it strange to work with and gave preference to animating a basic shape on the "obstacle course" task for this week's workshop.
However animating this rigged ball is something that I will revisit later when I gain a better understanding on animating rigged models.

Rigged ball
Instead of making a bouncy ball I wanted to have a hard ball such as a cue ball rolling/dropping and interacting with the "obstacles" making them move based on the strength of impact from the ball.
I do have to better on timing as in the dropping sections the fall is rather slow and the last section after the second drop feels almost like slow motion.
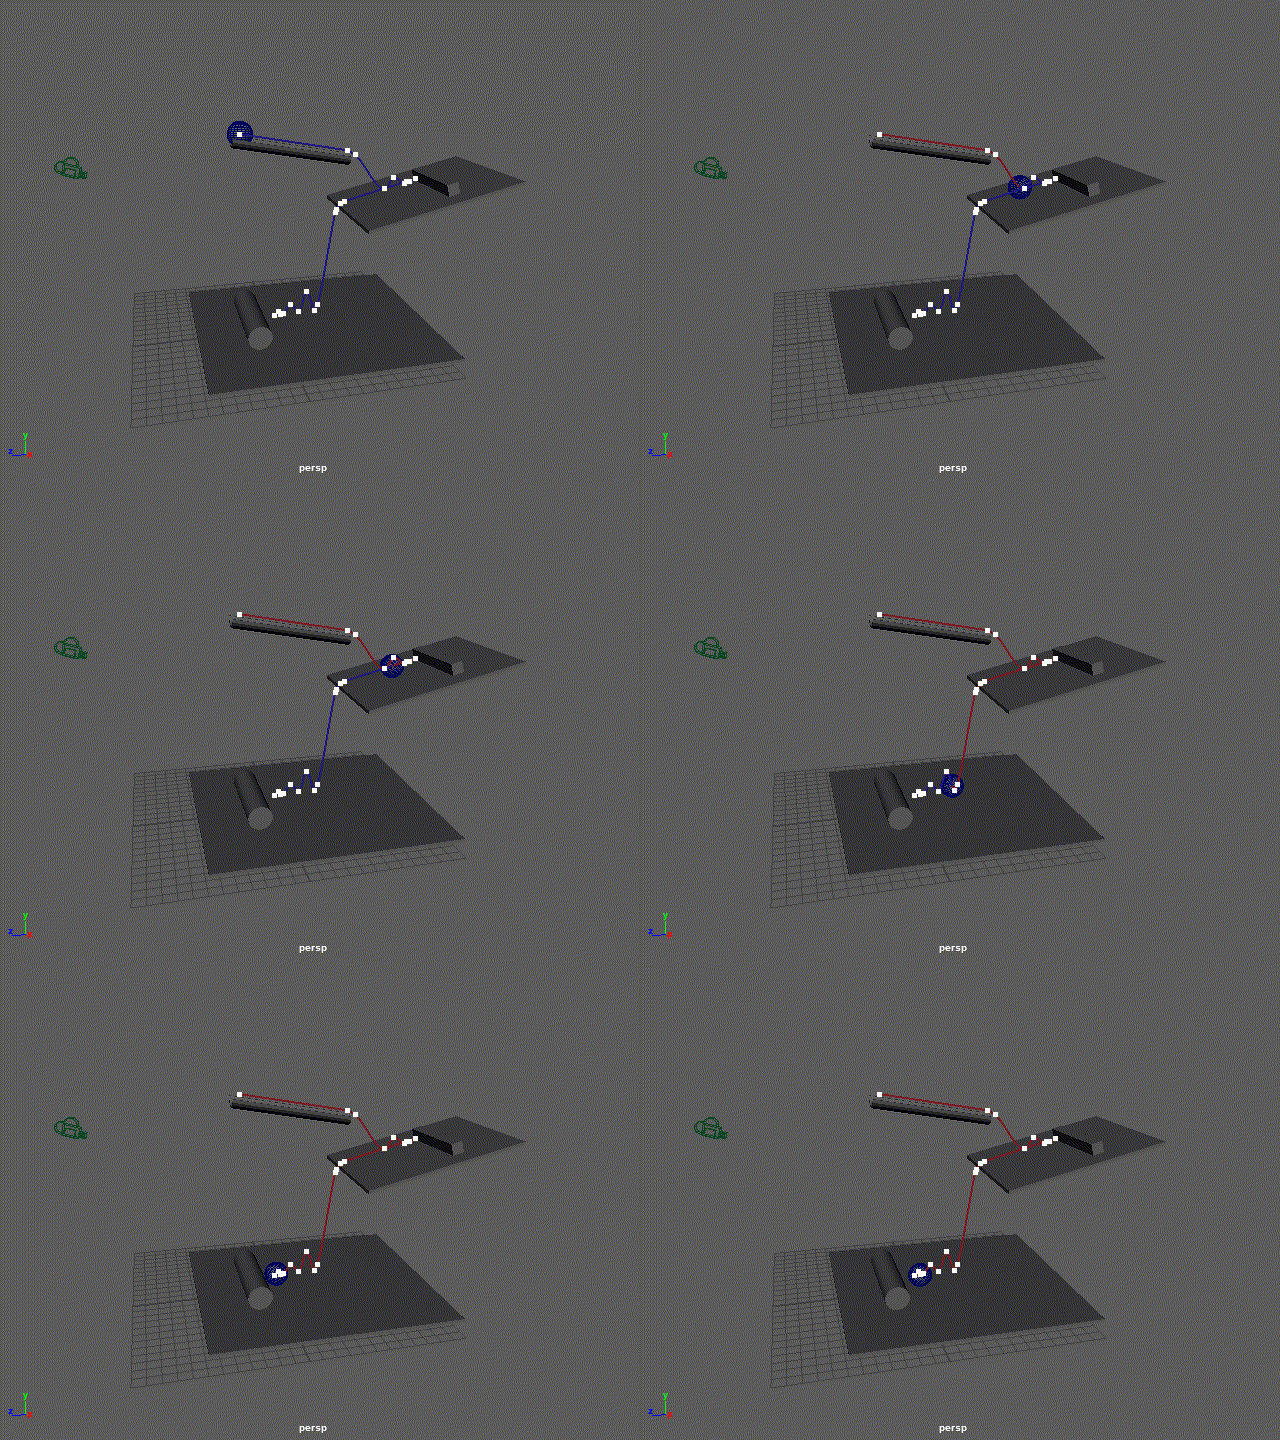
Gif animation of obstacle course with trail motion
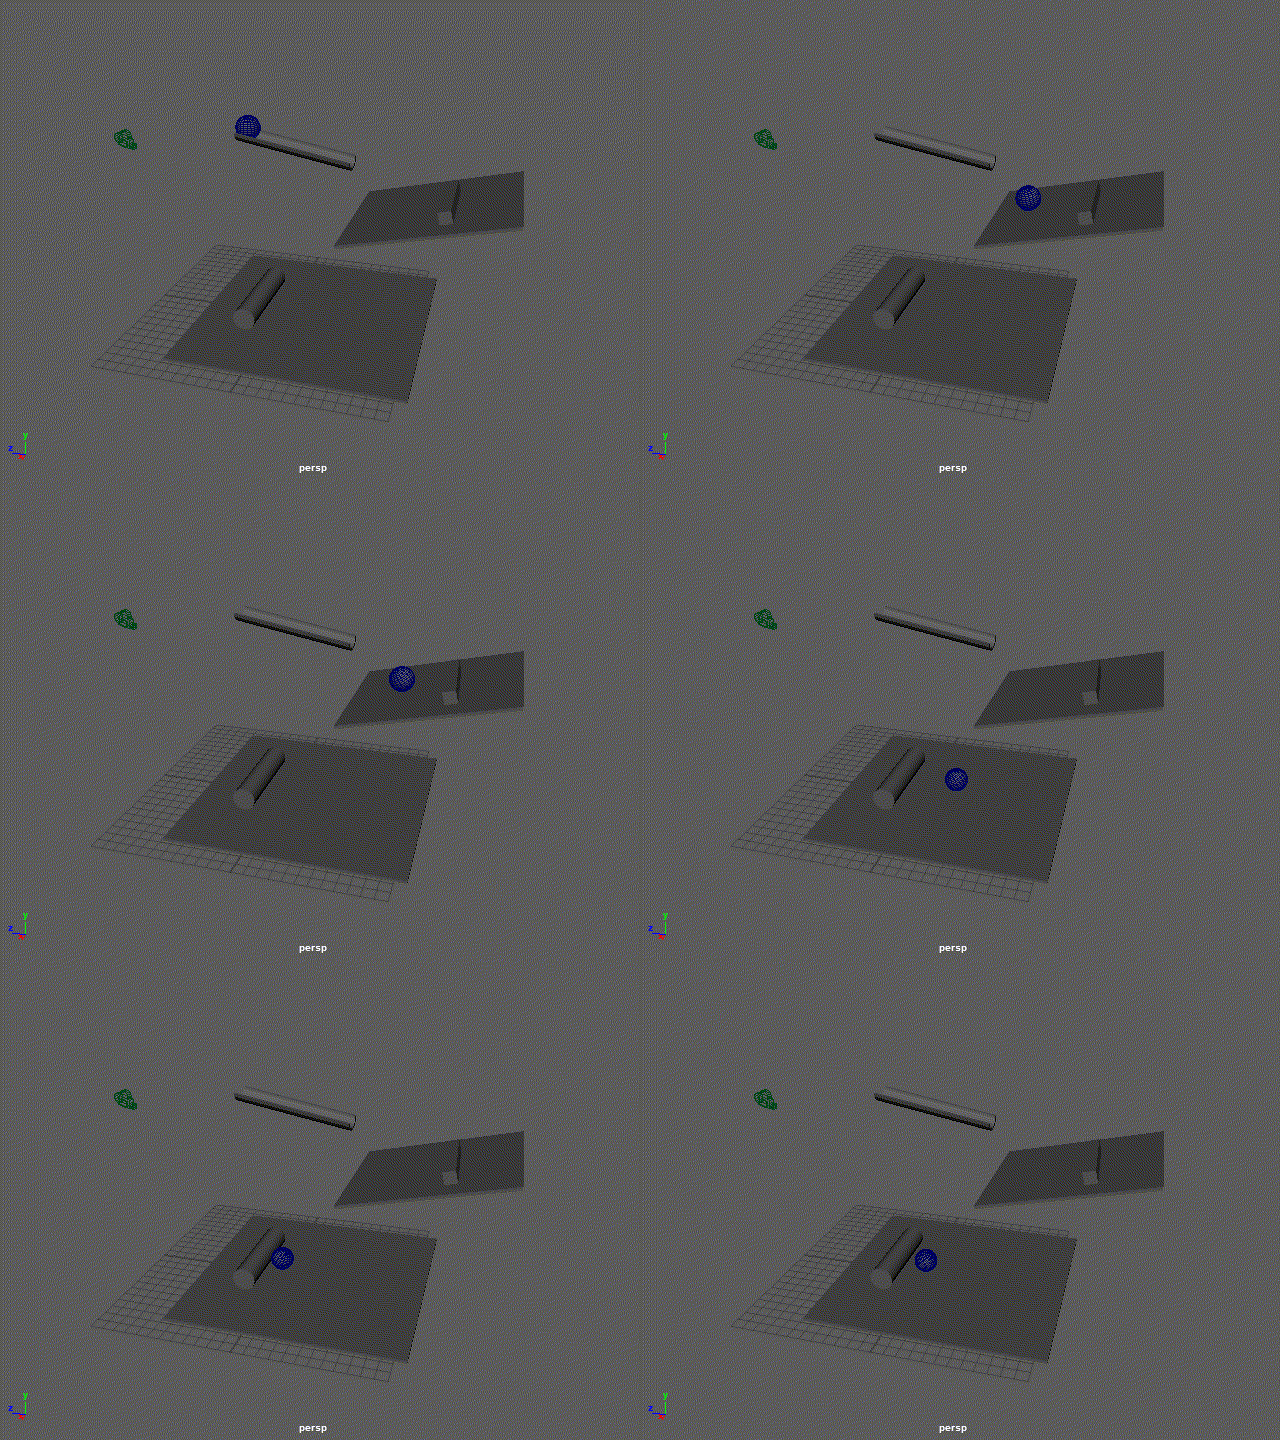
Gif animation of obstacle course
'Sack of flour' and Arm Rig
Sack of flour
For this week we were provided with a pre-rigged "sack of flour" with more advanced rigging controls and tasked to put the sack into different poses to explore the rigging controls of the model.
I decided for a tired sack pose and a threatening "The Matrix" like pose.
For the second I set a camera and had it move around the sack in a action shot type of way.
Afterwards we had to make an animation using the sack. For this I thought about having a stick/bat hit the sack and animate the drop.
Arm Rig
The second part of the workshop was to make a simple arm and rig it by setting a child-parent as well as freezing the transformations and adjusting the pivot position of each element.
Then from this basic rig to animate it.
I chose to animate a slap motion.
Since I quite enjoy adding a form of interaction I added a ball shape as the object being slapped.
Inverse Kinematics | Animation Output
Last week we explored Forward Kinematics (FK) with the "robot arm". While using Forward Kinematics, we must rotate individually in order to obtain the desired position starting from the parent object to child object.
In Inverse Kinematics (IK) you can animate the arm by animating the hand's position without having to rotate each object individually as the rest follows the hand's position.
To explore IK we were given a basic legs cube model.
On the model we started the rigging process by drawing the joint chain from the top of the leg to the foot. Afterwards using the IK Handle tool we connected the top of the leg joint to the heel on ball of the foot joint.
Once the handle was set up we made a circle nurbs curve around each of the feet and snapping its pivot to the IK effector at the heel, then parented by selecting the foot effector fist then the curve.
Lastly we parented top of the leg joints to the cube representing the hips and animated from there.
For the second part of the lecture we were provided with an arm IK rigged to "play" with.
So I animated the hand grabbing and lifting a mug.
Afterwards we were asked to animate the swing of an arm, paying attention at the hand position during the swing, more precisely at the wrist rotation.
Posing and ‘Head turn’
This week we were given "The Eleven Rig" to animate a Head Turn and a dynamic pose based on a reference image.
Eleven Rig Souce :
http://elevenrig.blogspot.com/p/tutorial-videos.html
This rig has a lot of functionalities and editable appearance options such has gender option, a choice between 2 hairstyle types and a bald model among other cosmetic options.
The way I animated the head turn with this rig was as if the character was being called and upon this waving and saying hello back.
For the Dynamic pose I wanted something warrior like, so after some searching I found one that I liked.
I added the image on an image plane and tried to put the model in the pose that I chose.
Assessment 1 - Basic Animation Principles
For the first assessment I went back to the provided ball rig.
I looked in some extra videos on timing, spacing and also how a cue ball behaves when being strategically hit with a cue in billiard.
The billiard video in particular helped me give some insight on how rotation and interactions affect the behaviour of the cue ball.
I thought about making a ball bouncing into a cup.
for this I took the principles from the angry animator's bouncing ball tutorial, as for the behaviour of the ball in the cup I considered the behaviour of the cue balls from the billiard video.
References:
Animation basics: The art of timing and spacing - TED-Ed
Mastering Pool (Mika Immonen) Billiard Training Cue ball control by Thailand Pool Tables
Angry Animator - tutorial-1: bouncing ball
https://www.angryanimator.com/word/2010/11/26/animation-tutorial-1-bouncing-ball/
I started by animating a simple trail where the ball bounces off the ground twice before going inside the cup. On the frame where the ball hits the ground it squishes, on the frames before and right after bouncing off the ground there is a slight stretch.
I did not want to overdo the stretch as I did not want to give the impression that the ball was "too bouncy".
I made sure to add extra frames on the top of the arches as its when the ball loses velocity due to gravity and less frames at the bottom arches.
I also added a rotation on the ball as it follows the trail.
When the ball finally hits the cup, there is a very slight squish, and because of the odd angle it hits the cup with, the ball rotates, I attempted to use the rotation principles from the billiard ball in this part of the animation.
The cup tips as the ball hits it and then tips back when the ball hits the opposite side of the inner cup.
To make this visible I changed the material of the cup into a dark transparent glass.
For presentation purposes I added a green wall in the back and a spotlight, but since the area outside of the spotlight was too dark, I also added a directional light to brighten up the general area. Lastly rendered it with the Playblast function.
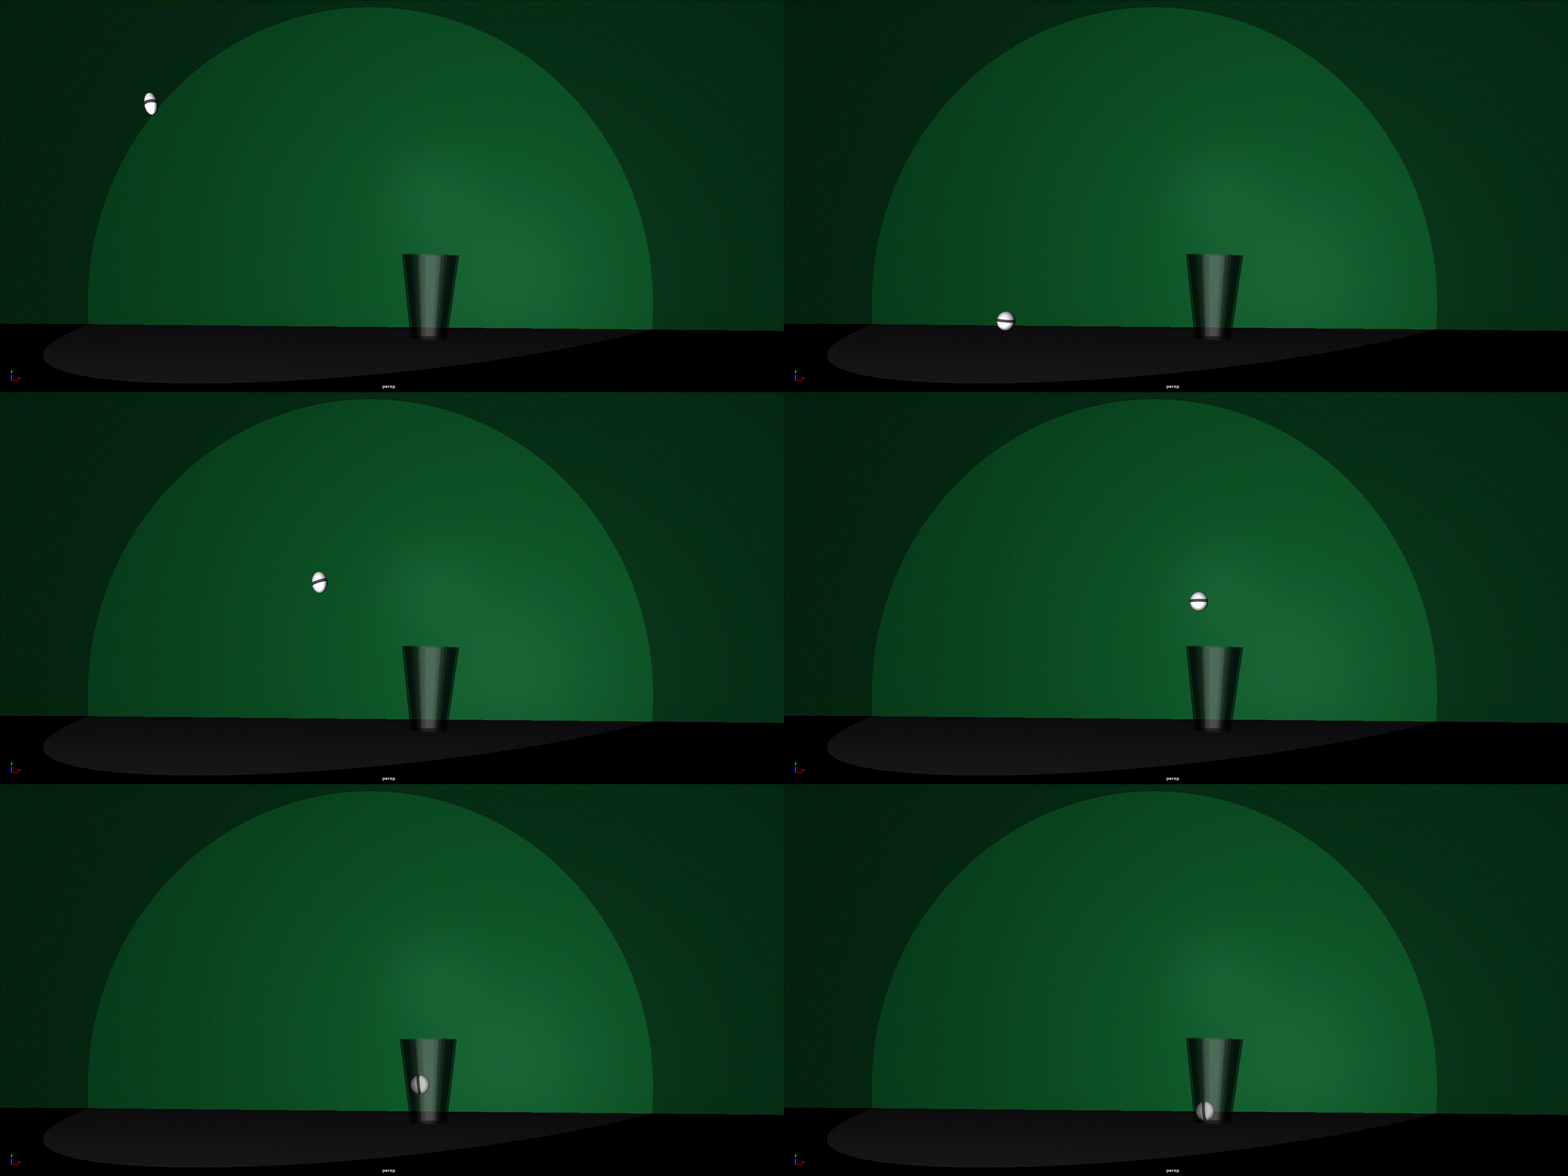
Youtube link: https://youtu.be/jpssJYMdqTM
Course Activity Week
Walk
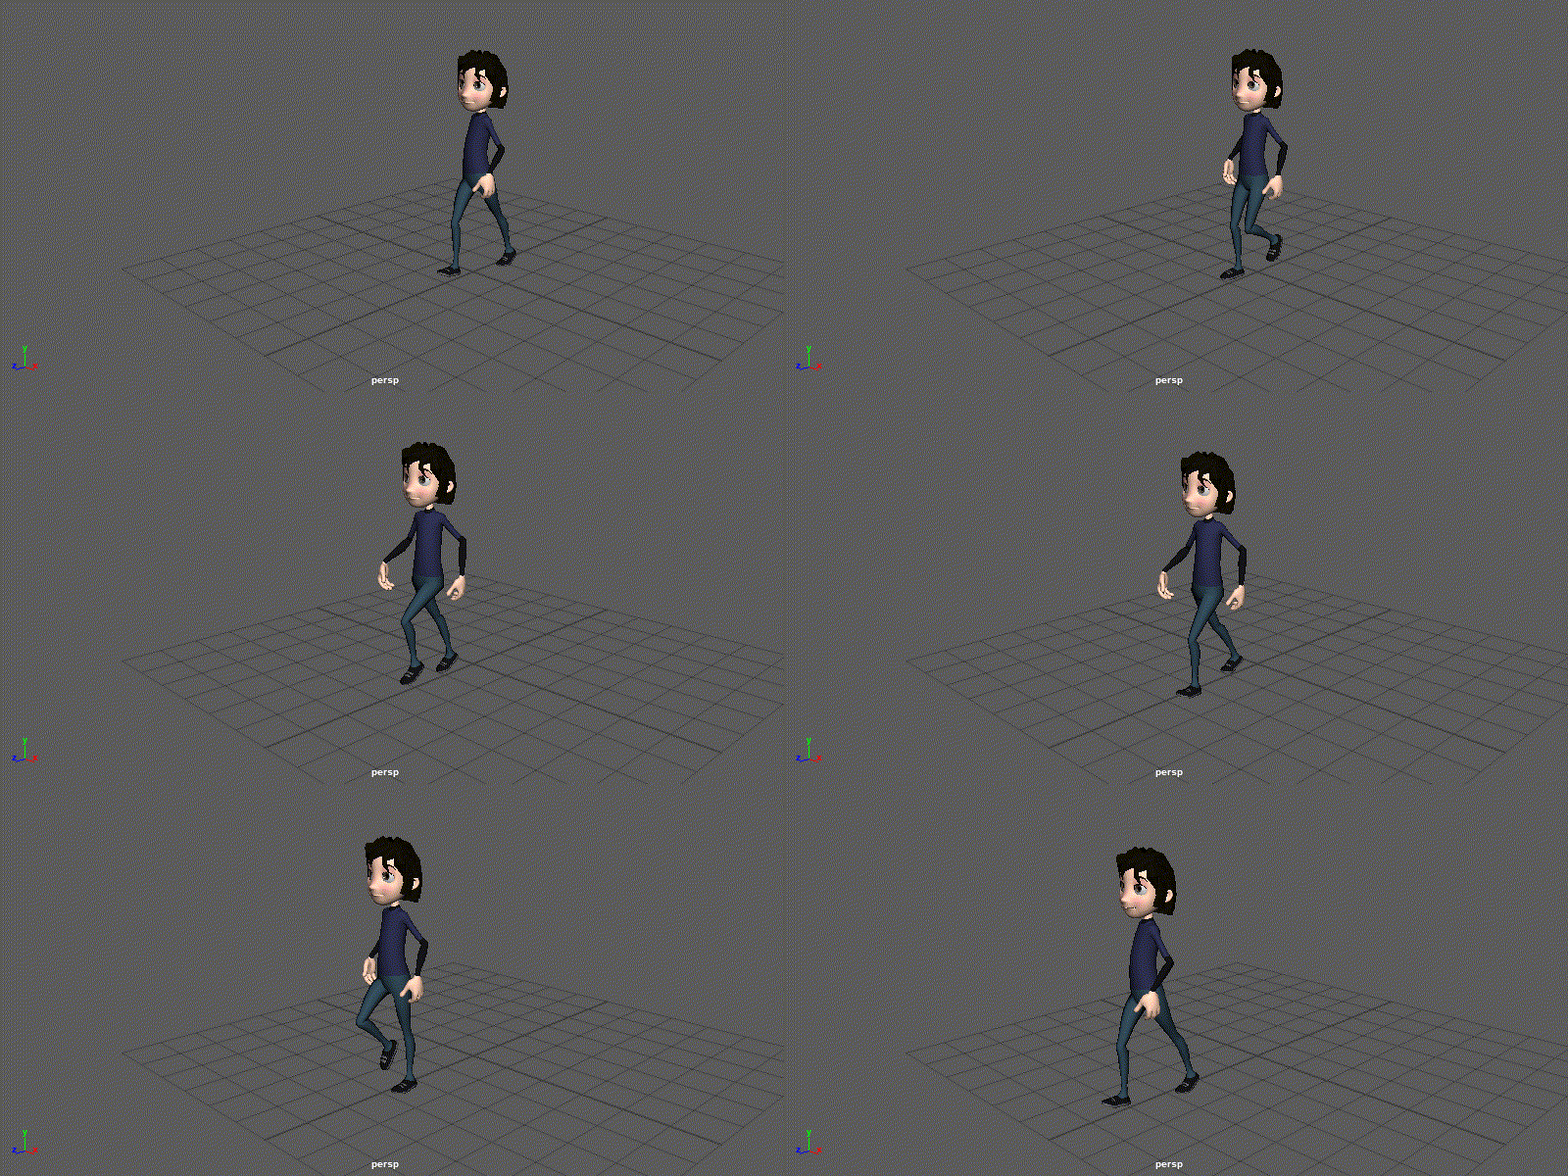
This week we grabbed the Eleven Rig again and using references we attempted to make a walk cycle animation.
I used the contents of the lecture slides as reference and started by animating the legs. I positioned the rig according to the keyframes suggestions.
I still struggle with making smooth animations, my animation looks like the character is marching instead of walking.
I added rotations to the upper body, on the shoulders and hips area to best match the walking cycle.
Lastly I just keyframed the model moving forwards with a focus on maintaining the feet positioned in the place where they land to avoid making the character look like it is sliding on the ground
Lifting Weights
For this week we looked into how to demonstrate weight of objects when a character picks them, for this I made a box with handles and tried to roughly animate the Eleven Rig picking it up.
We learned about two ways of constraining another object to the character in the scene, by parenting the second object to the character or by applying a parent constraint.
When parenting the animation will be limited to having the object already connected to the character.
As for when using parent constraints during the animation we can "activate" the constraint at any point of the animation.
In the rigging workspace, before applying the parent constraints we first set a few locators on the object (in this case a box) made the box a parent for the locators and then added the parent constraint form the character's IK control wrists to the respective locators on the sides of the box. This added a Blend Parent on the IK control channel box which we could tick on at any time during the animation to activate the constraint.
After having the parent constraints set I animated a basic box lift.
Animation Reference & Rotoscoping
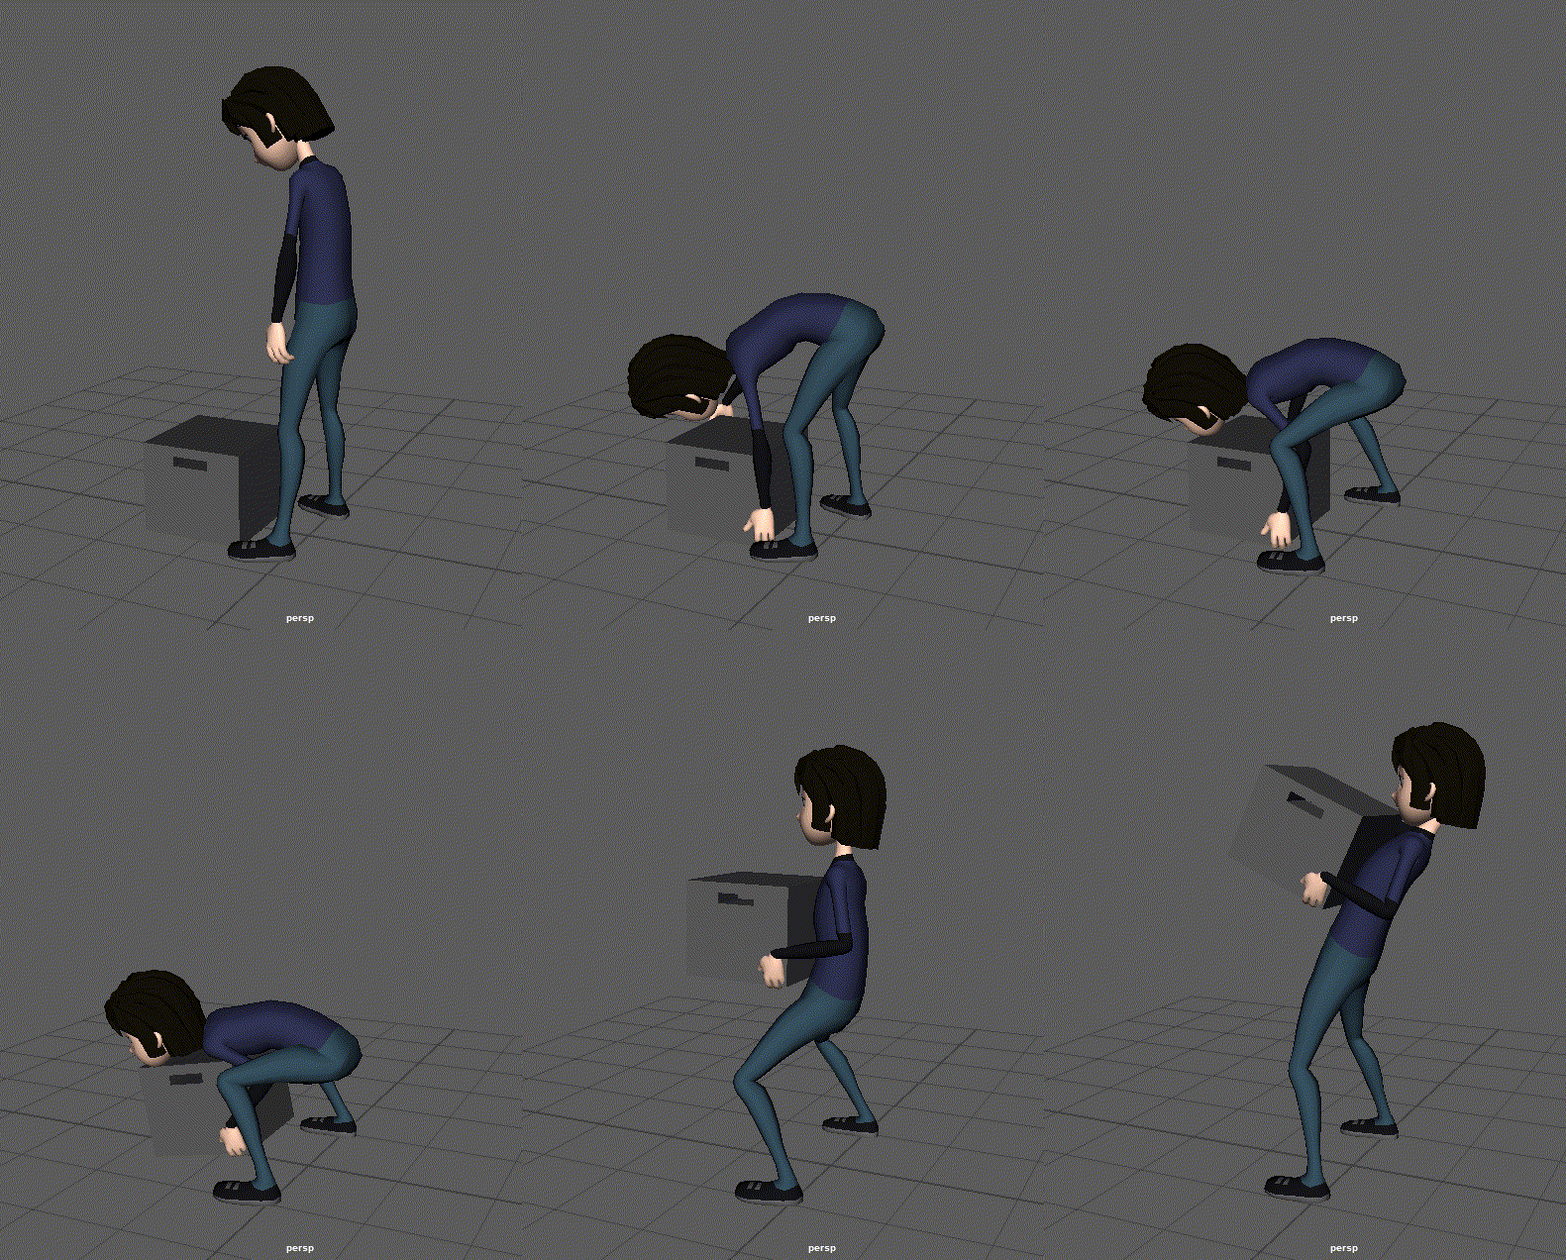
In this week we animated a box lift based on a video reference.
To do that we opened the video in After Effects to save it as an Image Sequence, then imported the sequence as a texture on a PolyPlane in Maya, then started animating the Eleven Rig using it as a reference.
I actually used the same scene from the previous week and redid al the keyframes while originally maintaining the parent to the item (box).
What I did wrong was started animating as I went, which resulted in too many keyframes oddly placed. I should have instead picked important frames making a clean "Blocked" version to make it easier to work on the details in between those specific frames.
Jump
In order to make the jumping animation we were given a breakdown of the key frames of a jumping animation, as well as a template scene with a blocked jumping animation as reference.
Opening maya and importing another 11 Rig into the scene, using the keyframes timing provided and the reference rig on the scene to pose and animate a jump.
I made some changes on the landing to make it feel a bit more natural.
Jump Keyframes
Jump KeyFrames
0 - Idle
8 - Ready Pose
18 - Moving Hold
20 - Recoil | Squash n Stretch
27 - weight shift forwards
30 - in air
33 - feet swap
39 - foot reach / contact
47 - squash
other screengrabs
Assessment 2 - Character Animation
For this assessment we were tasked to animate a character "moving with personality". As examples on how to demonstrate this would be animating a Weight Lift, and Action sequence or an expansion of the work done in the weekly tasks.
I opted to do something related to the weight lift.
First things first, I looked into video references for weight lifts on YouTube as well as Richard Williams' The Animator's Survival Kit (2001, ISBN: 9780571238347)
Video References:
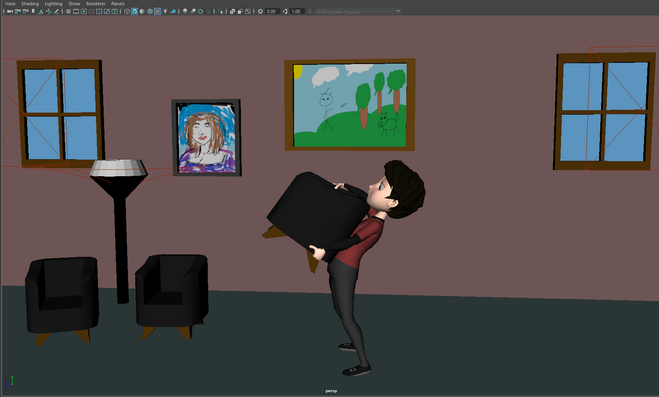
I also recorded myself lifting an armchair to use as reference.
In the end I decided to use my video reference for the weight lift animation.
From the video I converted it into an image sequence by using VLC media player (as I did not have access to after effects at the time), then set a polyPlane in Maya with a lambert material that pulls the image sequence for it's colour material. I set it just behind the Eleven Rig.
I then identified some initial keyposes to create an initial blocked animation to expand on.
I started animating form frame 44 onwards as I did not want to include the full sequence (there was some limitations when extracting the frames from the video)
VLC - https://www.videolan.org/
How to extract frames from a video using VLC - https://www.isimonbrown.co.uk/vlc-export-frames/

I extended he initial animation with a few backstops as I thought it would be too short.
after I started adding more detail to the base animation, getting the hands into the right position grabbing the chair by using parent constraints (set in the rigging workspace), a shoulder raise that happened during the lift as well as the feet movements/rotations/wiggle/leans.

When the character steps back I tried to give the impression of them adjusting their centre of gravity while doing so.
Can be better seen on the back view.
Other things I added in was making the character blink a few times during the animation and setting "look at" places, while the character mostly looks towards the chair, when lifting they will look away for a moment.
Once I was somewhat happy with the animation itself I assembled a quick scene with lights, I used paint to make the images used as "paintings" in the scene, the rest of the textures are just solid colours on a lambert material.
I had intended to add facial expressions however at the end I did not have enough time to work on them.
Result 1
Result 2
Link for playlist containing the assessment playblast videos:
https://youtube.com/playlist?list=PLgAAGWZrS1kUl7Amge2w30BPWWZ5SjRUG
.
Assessment 3 - Animating to an 11 second sound clip
Developement
Source Video
The first challenge in this assessment was finding an audio clip that I can visualise making an animation to.
I wanted to make something I personally found "funny", so I went in search for funny moments of one of my favourite games, Fable: The Lost Chapters (Lionhead Studios, 2005). I did not need to look far, I found a particular scene that I could cut an 11 sound clip out of.
So I downloaded the youtube video and cut out the parts that I did not want in to include as to make it 11 seconds, that way as well as the audio I have a video reference I could rotoscope from.
I used a free to use Microsoft video editor (Clip Champ) to cut the video.
TRIGGER WARNING before you play the video: LOUD sound
Video source: https://youtu.be/rqY2WBrDlJ4
11 second short clip
As the audio in the video was too loud, after I cut the video, I used audacity to extract the audio and adjust the levels which I then exported as a .wav audio file.
I also used the method from assessment 2 to get the frames from the video using VLC
However since the video was saved with a framerate of 30 frames per second that's the framerate I used for the animation, just to make the frames consistent with the original video.
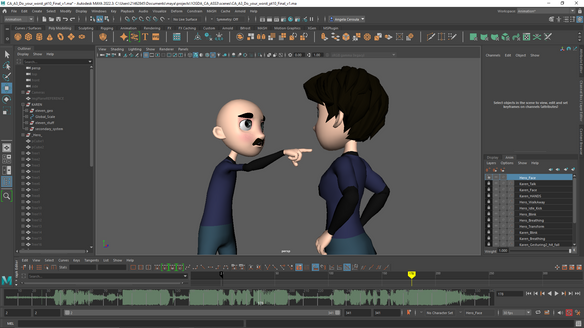
After having all the files ready started a new project on Maya with Eleven Rig, imported a second Eleven Rig as the scene will have 2 character actors.
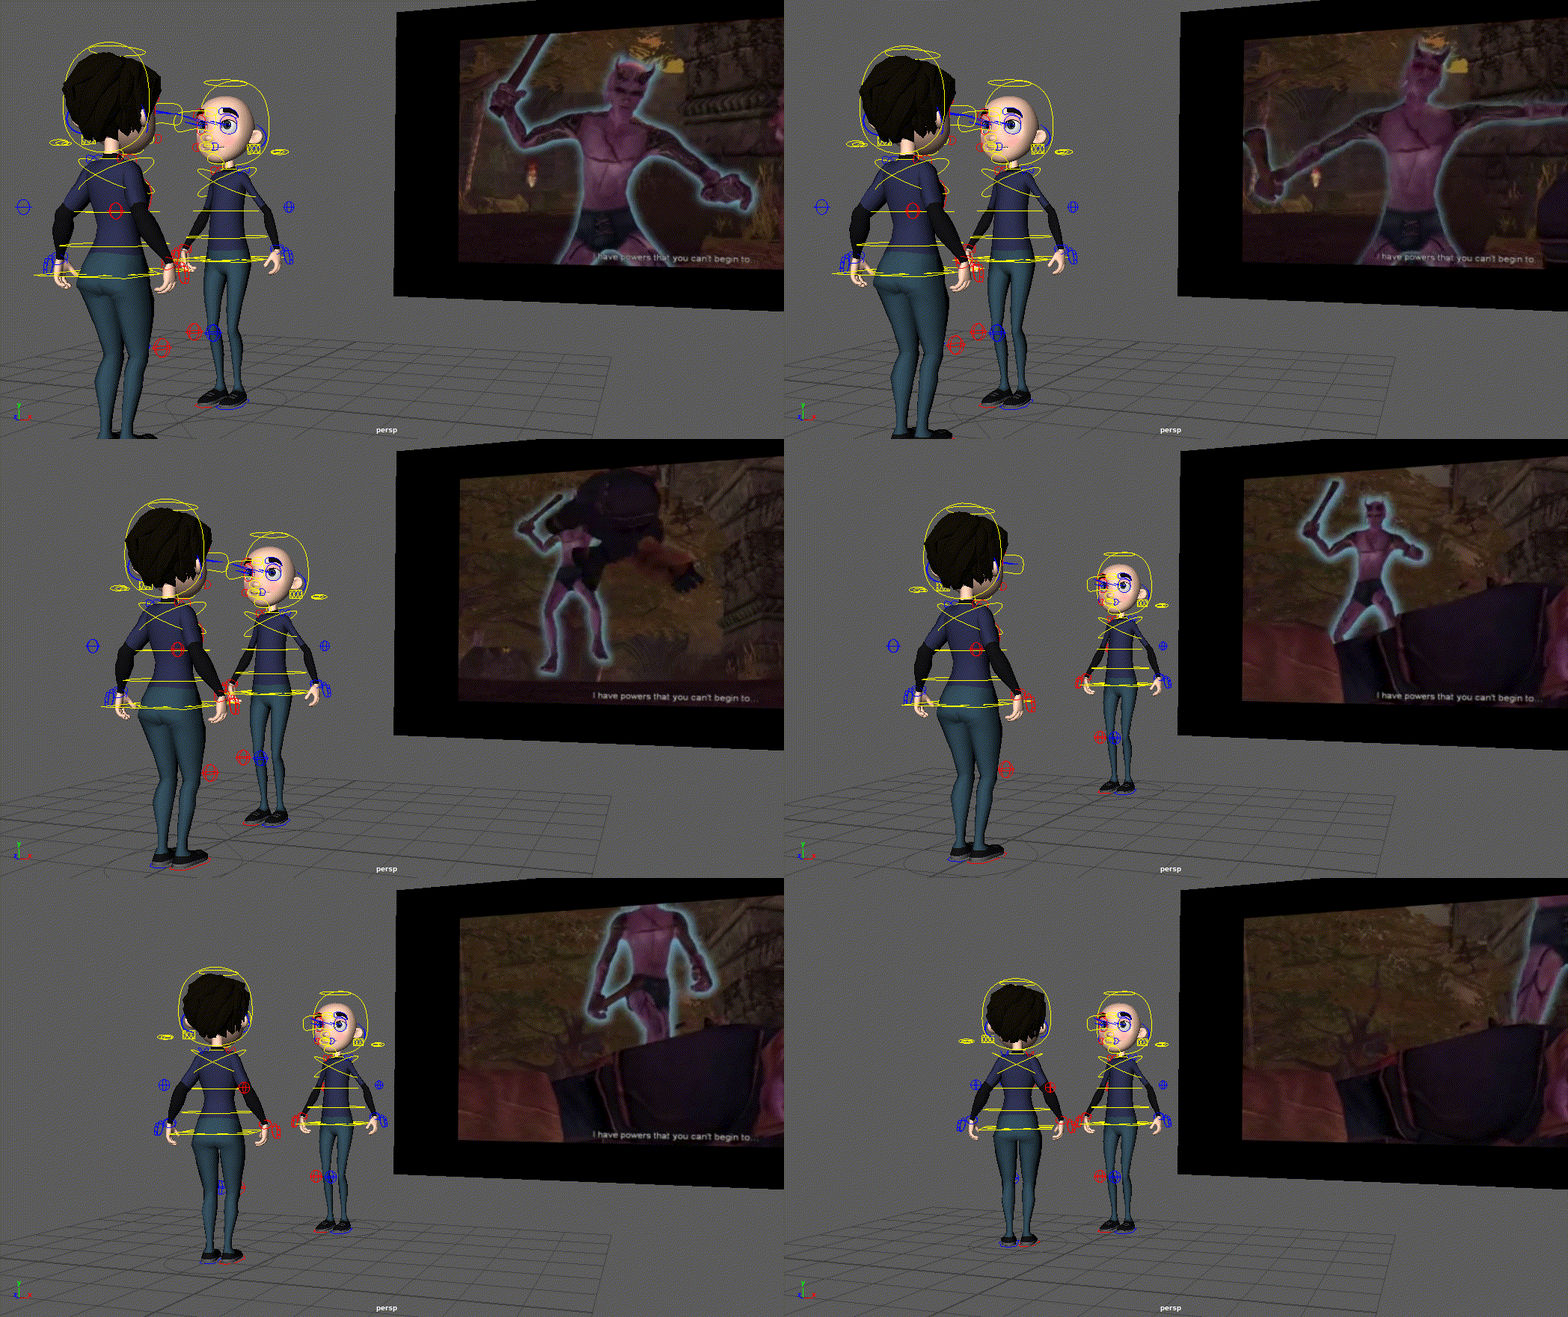
I set the image sequence on a plane, created 3 cameras which I positioned according to the 3 different views on the scene and added the audio file.
Then I made some minor changes to the rigs so they could be better identified.
Base scene and camera perspectives example

With all the essential elements on the scene I made a breakdown of the scene by element and by segment listing in which keyframes they occur.
In the video reference some aspects of the animation aren't occurring in sync with the sound and the Guildmaster (Karen) character reacts to being hit before the sound of being hit starts playing.
I made the breakdown as a reference to assist me and know what to focus on in which segment.
Majority of the scene is the Guildmaster talking until they get interrupted by being kicked, flying into the air and falling to the ground then the Hero walks past them.
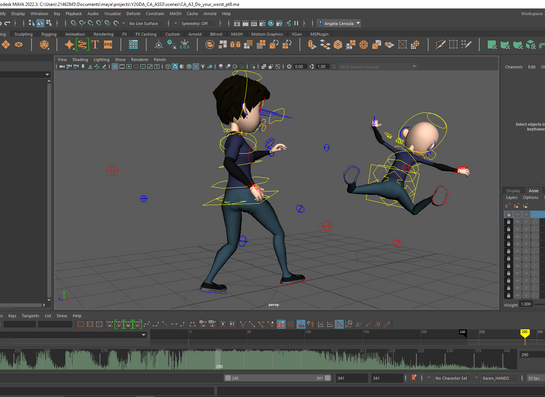
In order to block the transform positions I made 2 layers, one for each of the character and individually animated these transformations
Transformation Blocking
My next focus was animating the Guildmaster.
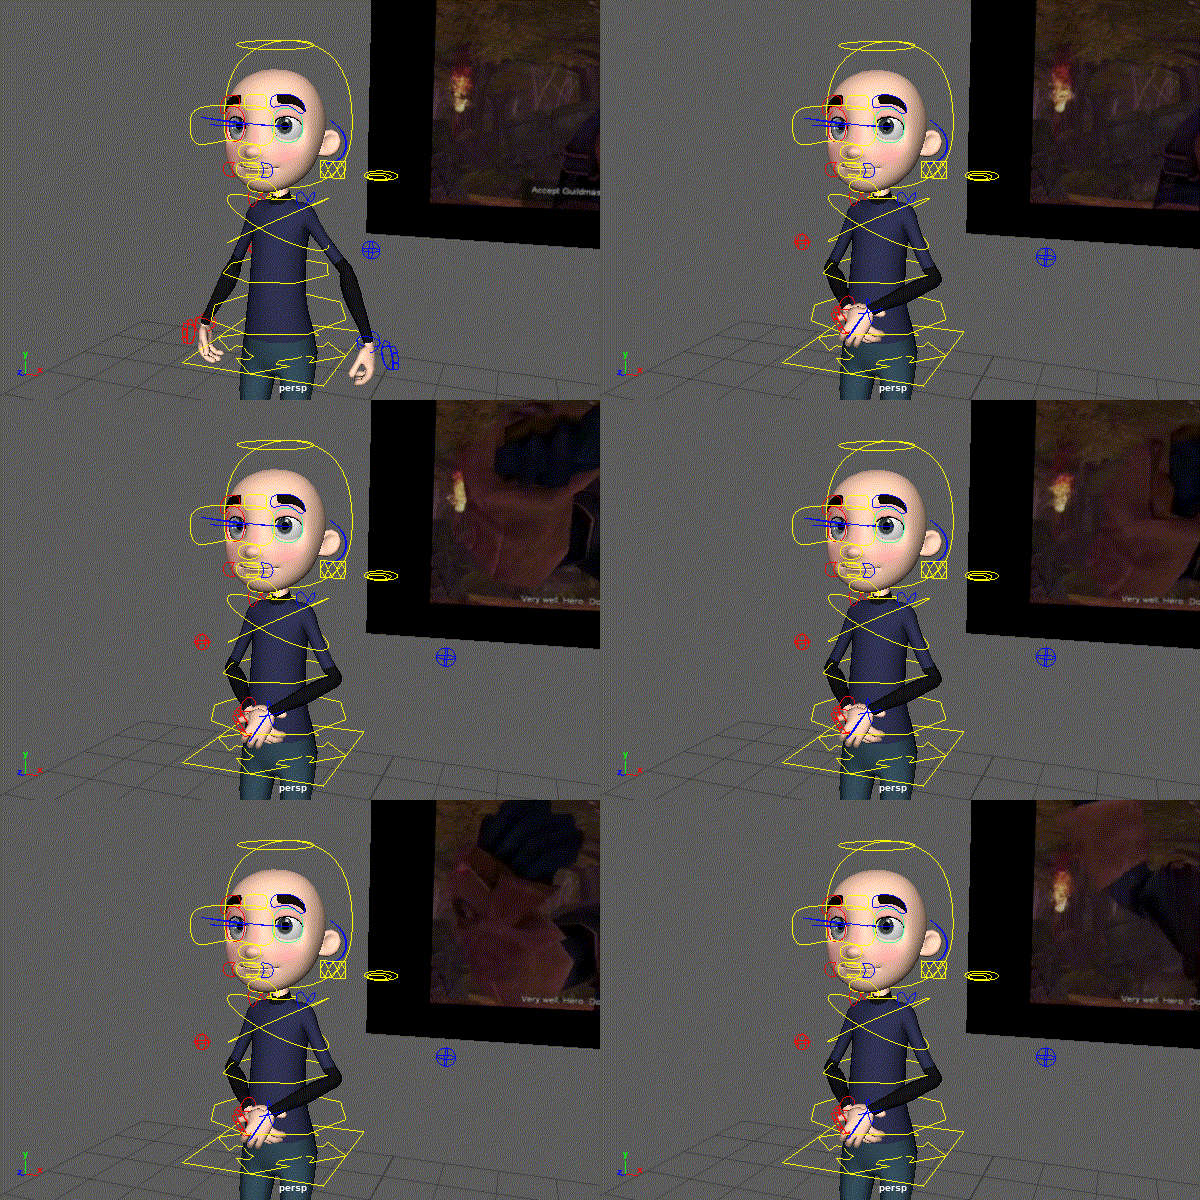
Firstly I made an animation layer just to handle the breathing movement, this layer only used the chest_ik_control of the rig doing a slight rotation back and forth on a loop. I also made a separate layer for blinking and set the Guildmaster in an idle pose.
I muted these layers so they wouldn't interfere with the base posing for the animations of the segments.
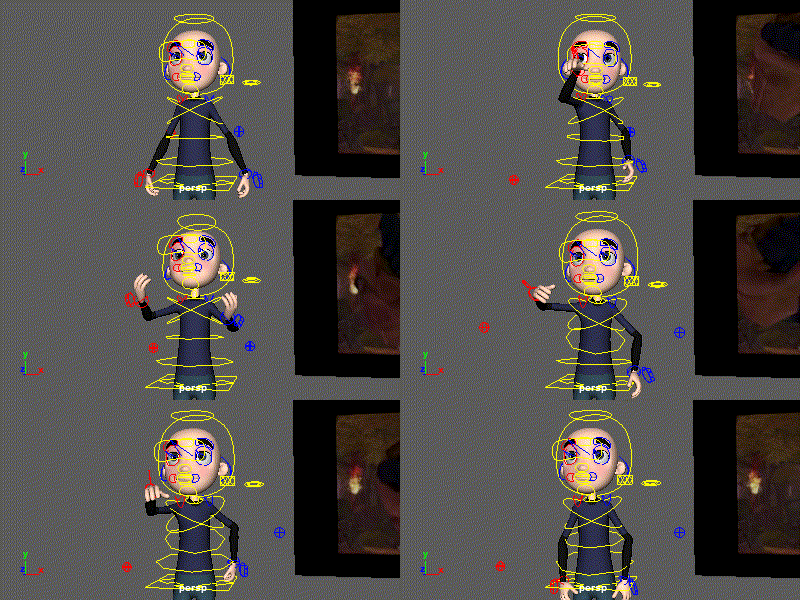
Then I made another animation layer to handle the upper body for gesturing in the talking segments, further breaking these segments.
Guildmaster Frames Breakdown
Scene breakdown
######################################################
#### ####
#### Do your worst ####
#### 11 second animation clip ####
#### ####
######################################################
Total of frames 1-341
30 frames per second
####
Intro
#####
Karen
Idle: 1-29
First line: 30-211
lipsync to Line 1
gesturing (video reference)
Second line: 228-280
lipsync to Line 2
gesturing (video reference)
Gets hit by Hero (slap or kick) : 281
Flies to the ground: 282 - 293
Contact with floor: 294
small bounce 296
floor: 301
flat: 307
ahhhuuuhgg(scream): 284 - 310 - 333
Line 1
Very Well, Hero. Do your Worst. I am no defenceless old man!
Line 2
I have powers that you can't even begin to--...
#####
Hero
idle? : 1-247
not on camera until frame 248
Initiates movement to slap or kick Karen: 260
Hits karen: 281
return to idle: 282 - 293
initiate walk away: 305
step 1: 322
step 2: 336
#####
Cameras:
IntroCam?(camera0): 1-29
KarenCam (camera1): 1-30-247
HeroCam (camera2): 248-279
FallCam (camera3): 280-341
Idle Guildmaster breathing and blinking
Karen (Guildmaster)
####### KarenCam 1-247
### Line 1 30-211
# Very Well, Hero.
Voice 35 - 70
30 - 40 - 44 - 48 - 78 right hand indicator finger pointing gesturing at Hero
79-95 transition to next gesture
# Do your Worst.
Voice 83 - 120
96- 120 both hands up for a "come at me" gesture
121 - 129 transition to idle pose
# I am no defenceless old man!
Voice 130 - 209
130-135 antecipation for air slap
135
136 - 140 air slap
141 - 158 transition to idle pose 2
158 idle 2
159 - 170 lift hand point at Hero
170
171 - 177 brings hand forward
177
178 - 210 transition to idle
205
211 - 230 idleish
### Line 2 231-280
# I have powers that you can't even begin to--...
#KarenCam last frame 247
####### Hero Cam 248 - 278
247 - 258 - 264 transition to idle (2)
275 last idle frame
276 - 280
####### FallCam 279 - 341
281 hit sound, start of impact that prompts Karen to fly off
285 highest point (fall pos1)
290 fall pos2
294 ground contact
297 highest point of bounce
301
307
Guildmaster rough segment frames 1- 230
After the main gesturing segment I made another animation layer to handle the animation of being hit and falling to the ground.
I made a separate layer as well to handle the heights of the fall, so they could be adjustable in case I needed to modify it later.
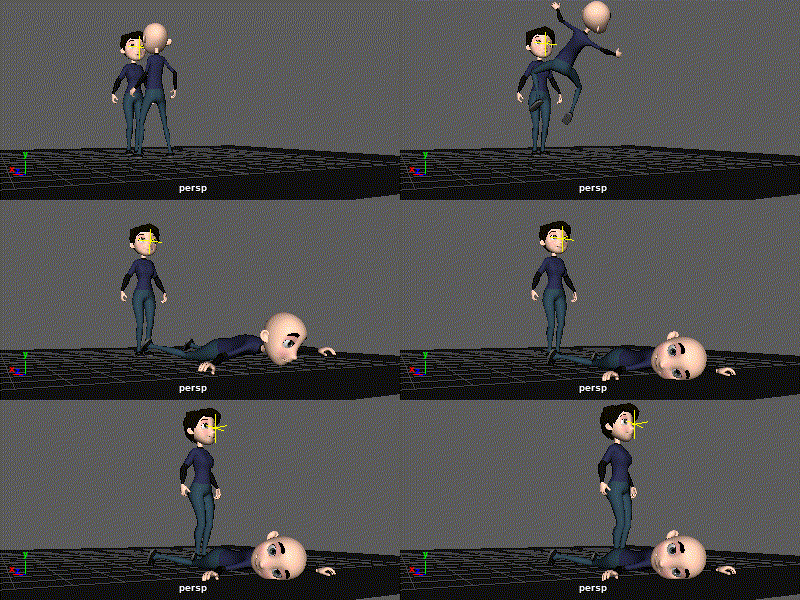
Guildmaster segment frames 270-341
Afterwards I blocked the Hero movements also making a breakdown of the character movements according to frames.
However there are some changes between the movements in the original source material and how I decided to make the movements, they were better adjusted to follow the audio momentum.
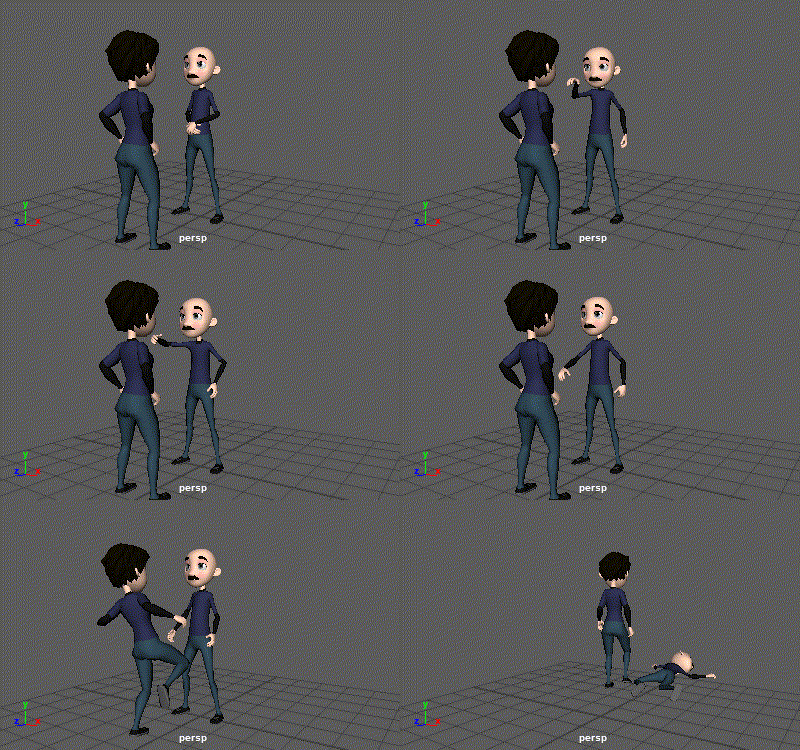
Hero
####### Hero Cam 248 - 278
2-248 idle 1
258 fighting pose
260 Initiates movement to kick Karen (make faster and delay by a few frames)
263
266
271
277
####### FallCam 279 - 341
281 kick hit
293 idle pose (make it 304)
#NewAnimation Layer
305 - 341 walk away
322 step 1
336 step 2
Animation Scene 2-341
Hero Frames Breakdown
Guildmaster fall scene screenshots
Hero animation Screenshots
I added another animation layer to animate the hands gestures, mostly for the pointing and other noticeable finger movements.
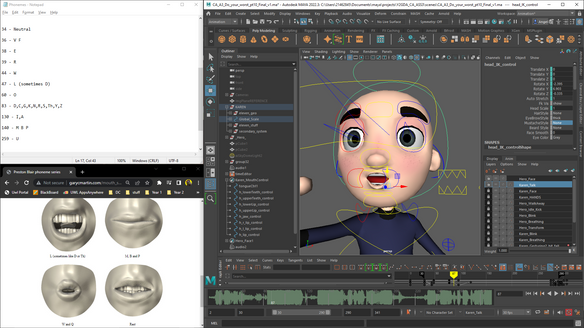
For the lip-sync, I made yet another animation layer just for the mouth and jaw, I made a "Set" with the controls so it would be easier to select the controllers to keyframe and mass copy keyframes.
With the help of a Visime scheme and a keyframe breakdown on a text document I keyframed the entire talking segments trying to follow along with the audio to know which visime to use.
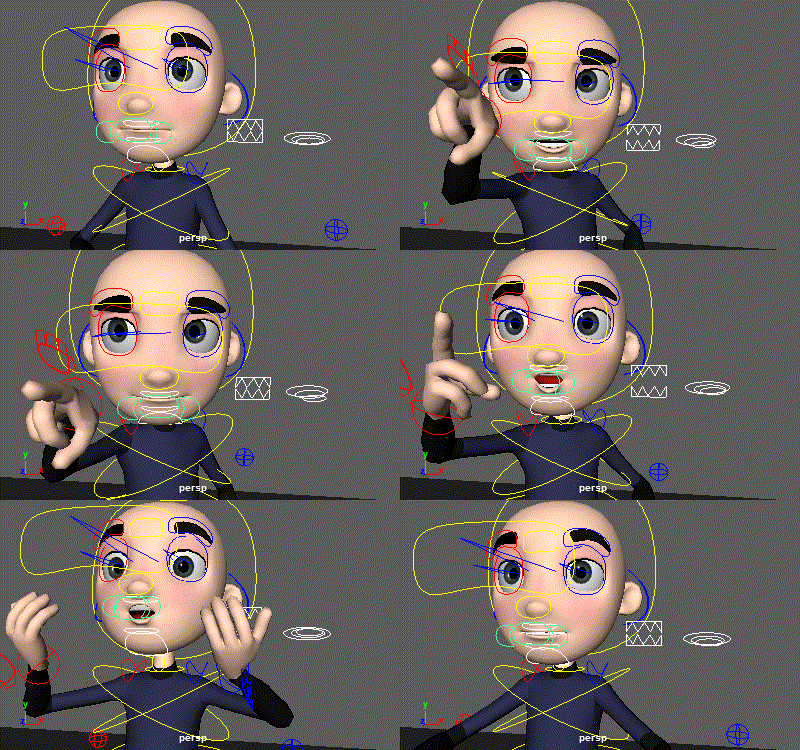
Visimes, hands screenshots
lip sync'd section
I fine tuned some parts of the animation then added some background shapes.
Then I used Maya's Camera Sequencer to set up the shots from the 3 cameras I created up at the beginning.
I was having some problems with the resolution and the sound not being exported in this mode so I manually saved 3 playblasts of the 3 different shots and merged them together.
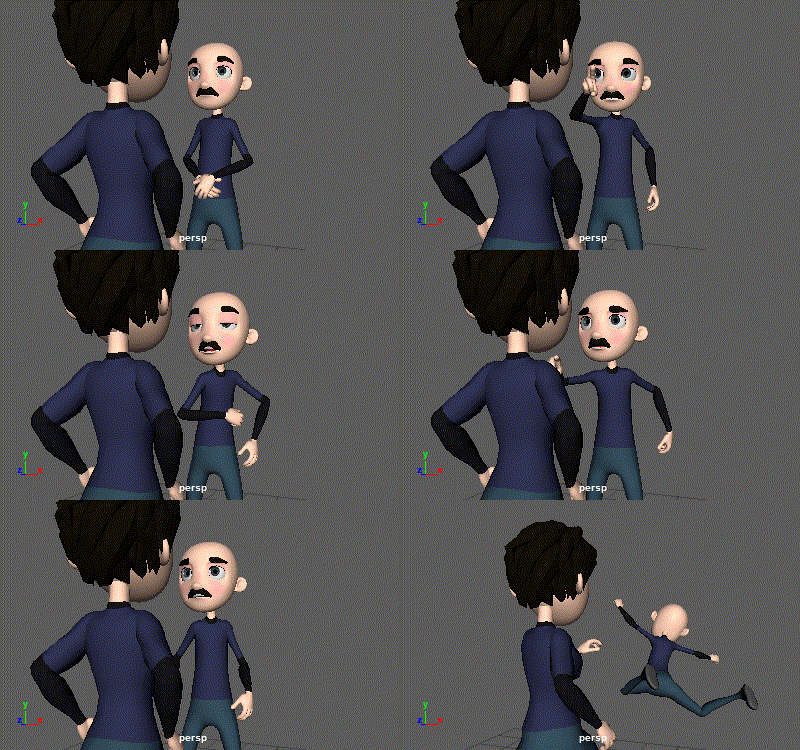
Full scene from 1 camera angle
Personal opinion
Overall the animation is not as fluid as I would like it to be, I know I could have done better if I had procured more reference material and/or recorded it myself. However once I was set on a specific audio I found it was relatively difficult to stray from the source material. The audio itself wasn't great but was something I knew I was going to enjoy doing.
Part of my limitations is creative freedom, something that I wish I would have done was to pick a random 11 second sound clip from a list and just be able to listen to it unbiased by what the original scene actually went like. This way I would have pictured a different scene in my head, one that I could draw a story board on then researched the specific movements afterwards.
It was a fun assignment, I felt that I learned a lot with it, and that walking animations are really not my cup of tea but I really enjoyed doing the upper body gesturing, it is a lot more expressive than simply walking.
Working using layers was also extremely satisfying, specially after key framing a whole segment and then activating the "breathing" layer to see how it affects the scene. Even a character on an idle pose with a breathing and blinking animation layer had a certain "life" to it.
References and Resources:
Lionhead Studios. (2006) Fable: The Lost Chapters [Video game]. Microsoft Game Studios.
Original video source: https://youtu.be/rqY2WBrDlJ4
Maya computer program: https://www.autodesk.co.uk/products/maya/
Eleven Rig : http://elevenrig.blogspot.com/
Audacity computer program: https://www.audacityteam.org/
VLC computer program: https://www.videolan.org/
Clip Champ computer program: https://clipchamp.com/en/
Viseme scheme: http://www.garycmartin.com/mouth_shapes.html


