Performance Animation
Quad Draw
Week 1
To kickstart the module we looked into the details for the assessment, where we need to make a robot model and apply a motion capture recording to it.
We covered Quad Draw in Maya, first by using a sphere as a base we tried Quad Drawing an Eye and then a Mouth shape while paying attention to topology and attempting to get appropriate loops.
Then by using an example picture on a plane we attempted to draw half a face.
Which then we sculpted the form using Maya's Sculpt tools to make a Venetian Mask-like face.
Homework
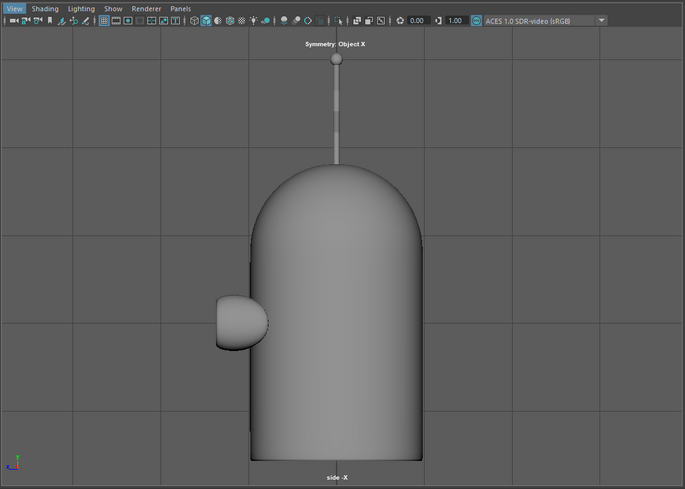
For homework we were asked to model a robot head based on the robot character shown in the video during lecture
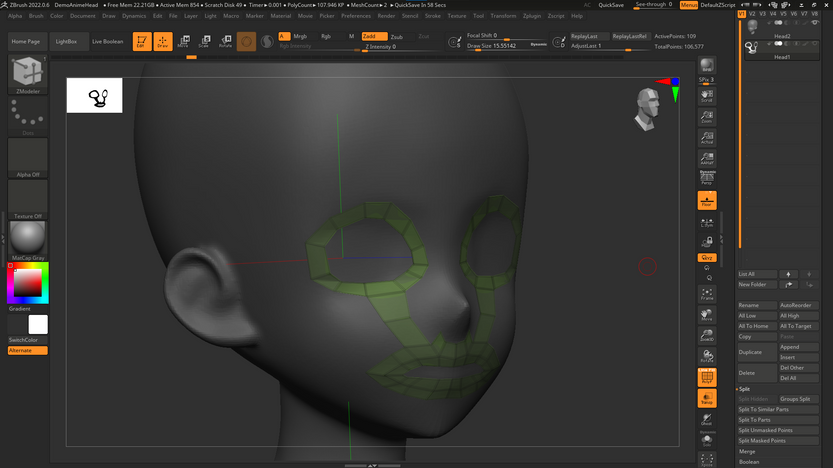
Retopologise zBrush
Week 2
This week we used the ZModeller to build topology using the DemoAnimeHead as template.
Human IK Rig Intro
Week 3
This week we were given a skeleton Mesh to rig in Maya and then pose it.
We also had a mocap session where some of us directed an actor into acting out a scene to be used in our assessment assignment.
In Maya we used the Quick Rig tool within the Human IK and used the step by step method.
1- I added all the geometry from the mesh
2 - embed method: polygon soup (has it is various objects)
3 - adjusted the guides to match better the locations on the mesh
4 - skeleton and control rig
5 - used default settings
After having the skeleton rigged (with control rig), we painted the weights.
Since it is a skeleton mesh with various separate objects that should not "bend" by themselves we used the flood method to get the bones weighted to the appropriate influence spots
Pose 1
Pose 2
Pose 3
Applying MoCap, Painting Weights and More Rigging
Week 4
In this week instead of using the control rig element we only used the skeleton and coved the process of adding mocap data to the skeleton rig.
we also briefly covered weight painting on a low poly demo humanoid robot mesh.
Using the mocap data from the previous week, I added both of my mocap scenes to the Skeleton rig
Hard Surface Modelling
Week 5
For this week we started by covering on how to customise zBrush's UI Interface.
Then we covered some techniques on how use the Clip, Trim and Slice brushes to make a "Sputnik".
ZBrush Pipeline
Week 6
This week we used the "Sputnik" from the previous week and recapped how to paint it in zBrush as well as using textures to paint the model.
We also covered UV's in zBrush and exporting to Substance Painter.
Storyboard and Animatic
Week 8-9
This couple weeks we learned about how to animate cameras dynamically and how to keyframe a camera for clean position changes without resorting to adding another camera.
We stated by downloading a free 3D model from TurboSquid then placing a regular camera, then keyframed the camera an adjusted the camera movement on the graph editor to ease in and out of the keyframed positions.
Assessment 2 animation camera blocking
Based on the motion capture animation I thought about how I could use the cameras placement to tell a story.
I blocked out the camera's position and movement in a manner to give focus on the character's actions through the animation dividing the action into different shots to give emphasis to areas of interest through the action.
1st shot - setting the scene shot, to introduce the viewer I wanted the camera to fall on the character by rolling in and finishing with a view of them.
2nd shot - show the character walking towards the well and leaning towards it
3rd shot - camera set inside the well showing the character looking in
4th shot - camera positioned to show the character pushing away from the well seemingly scared by what they seen inside
5th shot - cameo of character's "face" as they turn back for a second look
6th shot - shot showing the character approaching for a second look as they walk sideways/threading to do so
7th shot - camera positioned to see the back of the character as they leave
Creating your Environment
Week 10
Assessment 2 environment
For this week we were to create an environment for our assessment 2, since I already had the idea of the character looked into the well I already had an idea about what kind of environment the character was to be in.
Environment planning is something I actually really struggle with but I still tried to make it appropriate for the animation.
I had made a test render of the animation which prompted me to make changes to the final look of the environment in order to make it look less flat, I "sculpted" the ground plane in order to make it look better with the HDRI.
Animation Test
Resources
Windmill:
https://www.turbosquid.com/3d-models/free-windmill-video-games-3d-model/464415
Barn:
https://www.turbosquid.com/3d-models/3d-ready-red-barn-model-1361528
Well:
https://www.turbosquid.com/3d-models/3d-old-1519355
Fence:
https://www.cgtrader.com/free-3d-models/exterior/exterior-public/low-poly-modular-old-wooden-fence
Floor Material:
https://quixel.com/megascans/home?search=forest&search=mulch&assetId=vj3qdbj
HDRI:
https://polyhaven.com/a/farm_field
Assignment 1 - Character Development
For this first assessment we were tasked to do a 3D model of a mech/robot character, rig this character and pose it in 5 different dynamic poses.
Concept
As a basis for my mech character I thought about the Assassin Droid from the video game Star Wars: Knights of The Old Republic. I also looked into other droids from the Star Wars series as well as the Synths from the game Fallout 4.
With those as basis I put together a mood board with various images found in google images.
Modelling
When modelling the mecha character I tried to kept it low poly to avoid issues in the long run.
I tried to base it around primitive and blocky shapes at first.
For the knees and elbows I made them in piece that would work together like actual hinges would.
Painting
Before exporting to paint i made sure each of the robot parts had its own material attributed to it with appropriate UV for the painting process, I then imported the model into Substance Painter.
On substance painter I used some of the default smart materials and played around with the effects, some effects such as the scratchy metal look I applied to most of the parts of the character.
I also played around with generator effects to give more wear impression on the edges, these are specially visible in the head details.
C.U.E.C.A 4000 - Caution Use Extremely Careful Approach 4000
Submission - 5 Dynamic Poses
Pose 1
Pose 2
Pose 3
Pose 4
Pose 5
Assignment 2 - Motion Capture Scene
Mocap
Assessment 2 consisted of making a short animation with mocap data planned and directed by us applying it to the character we made in assessment 1.
My idea consisted of a curious robot that is jumpy when encountering something odd, much like a cat or a monkey, thus one of the mocaps had the actor behave like a monkey.
This can be seen in Week 4's post.
Camera
We were advised to block out the camera for this assessment as one of the first things after having the model using the mocap data.
You can see this on Week 8-9's post.
Environment
As for the environment I chose to make the environment an outdoors scene in a farmland, it made sense for there to be a well in that type of environment.
You can see it on Week 10's post.
Adjustments, export and sound effects
Before the last renders I did some adjustments to camera angles, I also had added a 3 point lights system for when the character looks down the well, has without these that shot in particular would look extremely dark.
Being considerably content with my scene I rendered it as an image sequence in 1080p resolution and imported it into Adobe Premier so I could add audio to the scene.
For the audio I looked through Pixabay for sound effects
To start I wanted an ambient sound, a birds chirping background sound seem ideal seeing as the scene is set in a rural area.
As the floor is essentially dirt I looked into footsteps on dirt/gravel and in Premier I cut the audio and adjusted it to match the character's steps.
I felt that by just adding these sounds effects really brought the animation to life.
I also look through to add some robot noises but I did not find any that I considered entirely to my liking, however I still gave it a try. I used a "robot noises" sound that I cut and adjusted to match more or less the character's movement reaction.
Resources
Final Animation
No bot noises version


